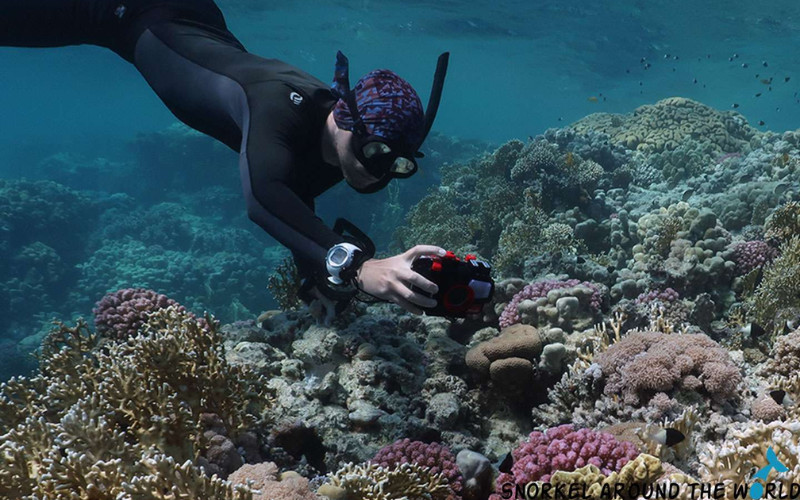
You’ve planned the trip, booked the tour, and found yourself floating above a coral formation with a turtle drifting past two metres below – and the photo you take looks grey, blurry, and nothing like what your eyes just saw.
The Great Barrier Reef is visually extraordinary, but underwater photography has its own rules, and none of them are obvious if you’ve only ever shot above water. Cairns Discovery Tours sees it every week – visitors come back from the reef raving about what they saw, but disappointed by what their camera captured. This guide covers what actually works, pitched at snorkellers on day tours from Cairns, which is where most people will be shooting.
Why underwater photos look different from what you saw
Before getting into equipment and technique, it helps to understand why underwater photos disappoint people – and it’s not the camera’s fault.
Water swallows colour as you go deeper. Red disappears first, around three to five metres down. Orange fades at around ten metres, yellow shortly after. By fifteen metres, the world looks blue-green and flat, which is why reef photos taken without artificial light at depth look dull even on sunny days.
At snorkelling depth – one to five metres – natural light is your friend and colour is mostly preserved, especially in the morning. But tiny particles floating in the water soften everything and wash out contrast. The more water between your lens and your subject, the less sharp and vivid the result.
Getting close to your subject is the single biggest improvement most people can make. By a long way.
Choosing your camera: a practical guide for day tour snorkellers
Most people visiting the Great Barrier Reef on a day tour from Cairns fall into one of three camera categories. Here’s a quick comparison before the details.
| Camera type | Best for | Limitations | Price range |
| GoPro / action camera | Wide-angle video, coral panoramas, selfie-style shots | Detail shots of small subjects; low light | $300-$600 |
| Waterproof compact | Stills quality, optical zoom, manual controls | Autofocus can hunt in murky water | $400-$800 |
| Smartphone in housing | Colour accuracy, instant sharing, multiple focal lengths | Touch screen awkward underwater; housing quality critical | $50-$300 (housing) |
GoPro and action cameras
The most popular choice on reef day tours, and for good reason. GoPros are small, genuinely waterproof to depth, durable, and easy to manage while snorkelling.
What works:
- Wide-angle footage and photos of large coral formations, schools of fish, and open-water scenes
- Video – GoPro’s stabilisation makes reef footage watchable in a way that still cameras sometimes can’t match
- Selfie-style shots with the reef behind you
What doesn’t work as well:
- Detail shots of small subjects – the wide-angle lens makes everything look further away than it is
- Low-light situations – colour drops off quickly in overcast conditions or shade
- Fast-moving individual fish – the shutter speed in auto mode often isn’t fast enough
Key tip: Get closer than you think you need to. The GoPro’s wide-angle works against you at a distance. Put the camera within 30-40 centimetres of your subject, and the results improve immediately.
Waterproof compact cameras
Cameras like the Olympus Tough series and the Canon PowerShot D series are designed for underwater use. They offer better image quality than action cameras at reef depths, particularly for stills, with proper optical zoom, manual controls, and dedicated underwater scene modes.
What works:
- Better colour accuracy and detail than action cameras, especially in good light
- Optical zoom for detail shots without physically getting close
- Raw file capture on some models, which allows for more correction in editing
What doesn’t work as well:
- Autofocus can hunt in murky water or when subjects are moving quickly
- Smaller sensors mean noise in darker conditions
Key tip: Use the dedicated underwater white balance preset if your camera has one. It compensates for the blue-green shift that water introduces and restores the reds and oranges that would otherwise disappear.
Smartphone in a waterproof housing
A growing option as phone camera quality improves. A good waterproof housing rated to ten metres or more (brands like Kraken, Divevolk, and Watershot make well-regarded options) turns a modern smartphone into a capable reef camera.
What works:
- Excellent colour and processing in good light
- Multiple focal lengths on modern phones give you flexibility
- Immediately shareable results without needing to transfer files
What doesn’t work as well:
- Touch screens through a housing can be awkward to operate with wet hands
- Autofocus can struggle in lower-light or high-contrast underwater environments
- Housing quality matters enormously – a cheap case leaking at five metres ruins the phone and the day
Key tip: Test the housing seal before your tour day. Fill a sink, submerge the housing without the phone for five minutes, and check for moisture inside before trusting it with your device.
Professional cameras in underwater housings
If you’re shooting a mirrorless or DSLR in a housing, you already know what you’re doing. The practical tips in this guide still apply – particularly around light, position, and timing – but the technical settings guidance is less relevant. For serious camera work from a Cairns day tour, ask our team about operators who run smaller vessels or have dedicated photography dives.
Light: the most important variable
Light determines almost everything in underwater photography. Here’s how to use it.
Shoot in the morning
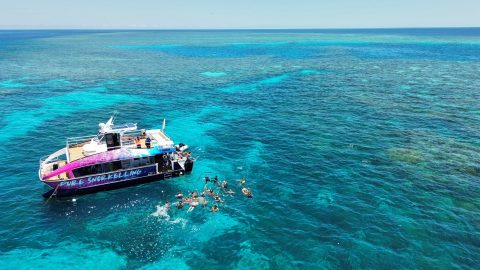
The best underwater light at the Great Barrier Reef is between 9 am and noon on a clear day. The sun is high enough to penetrate the water, the angle brings out colour and contrast, and the reef is at its most visually vivid. Most Cairns day tours arrive at the first reef site between 9 am and 10 am – use that first snorkel session for your best shots.
In the afternoon, the sun angle lowers, shadows lengthen across the reef, and the light drops. Afternoon snorkelling is still wonderful; it’s just harder to photograph.
Keep the sun behind you
Shooting into the sun creates a flare and silhouettes your subject. Position yourself so the sunlight is coming over your shoulder and onto whatever you’re photographing. For reef fish and coral detail, this makes an immediate difference – colours come through, the subject is properly lit, and the background retains some depth.
The exception is intentional silhouette shots – a turtle or a school of fish with sunlight behind them, and you shooting upward. These can be striking when done deliberately.
Overcast days aren’t hopeless
Overcast conditions reduce light but also reduce harsh shadows. Colours look flatter, but you can still get good shots in shallow, clear water. Compensate by shooting in the shallowest sections, getting as close as possible to your subject, and increasing ISO if your camera allows it.
The most important technique: get closer
Water reduces visibility. Every extra centimetre between your lens and your subject adds haze, strips colour, and softens focus. The golden rule of underwater photography is: if you think you’re close enough, get closer.
For a GoPro, this means putting the camera within 30-40 centimetres of your subject. For a compact camera, within 50-60 centimetres. This feels uncomfortably near at first, but most reef fish on the outer reef are used to snorkellers and will hold position if you approach slowly.
How to approach subjects without spooking them
- Move slowly and steadily – fast movements trigger flight responses
- Keep your fins still and use slow, sweeping kicks rather than rapid flutter kicks
- Approach from the side or slightly above rather than head-on
- Hold your breath briefly when composing a shot to reduce bubbles and body movement
Composition: what makes a reef photo work
Most underwater photos show either too much – a wide expanse of reef with nothing to focus on – or too little, a blurry close-up of something unidentifiable. Here’s what separates the memorable shots.
Choose one subject
The reef is overwhelming. There is always something in every direction. The instinct is to try to capture all of it, which results in busy, confusing images. Pick one thing – a turtle, a single coral head, a parrotfish at a cleaning station – and compose around that. Everything else becomes context.
Shoot from below, not above
Most people hold their camera at face level and shoot down at the reef, which produces a ceiling-of-fish perspective with dark water above and bright sand below. It works occasionally, but it’s the default, and it shows.
Position yourself so your subject is between you and the surface, then shoot upward. The sunlight creates a bright, dynamic background. A turtle photographed from slightly below, with the sun behind it, looks completely different to the same turtle shot from above.
Use the reef as a frame
Coral formations, archways, and overhangs can frame your main subject naturally. A fish photographed in open water looks different to the same fish positioned in a gap between two coral heads. The reef itself provides depth and context that an open-water shot lacks.
Shoot vertically
Horizontal shots dominate because that’s the default orientation. But turtles, tall coral formations, and upward shots of fish near the surface often work better in portrait orientation. Rotate the camera 90 degrees and see what changes.
Specific subjects: how to photograph them well
Here’s a quick reference for the most popular reef subjects, followed by detailed tips for each.
| Subject | Key technique | Common mistake |
| Sea turtles | Get ahead and below, shoot upward | Chasing from behind (shell and fins only) |
| Reef fish | Use burst/action mode for moving fish | Shooting in standard auto (too slow) |
| Coral | Wide shot in good light, sun behind you | Touching the coral to position yourself |
| Giant clams | Shoot directly above or at eye level | Shooting from too far away |
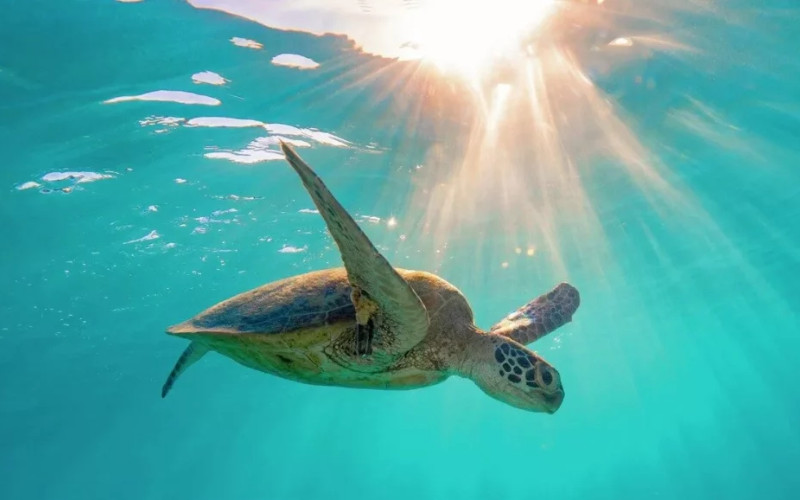
Sea turtles
Turtles are the most-photographed reef subject and the one where most people end up disappointed. The common mistake is chasing the turtle from behind, getting a shot of the shell and retreating fins.
Instead, let the turtle come to you, or position yourself ahead of its path and wait. Turtles surface to breathe every few minutes and are predictable in their movement. Get slightly below and ahead, and when it passes or surfaces, shoot upward. The best turtle shots show the face, the eye, or the full animal from slightly below with surface light behind it.
Reef fish
Fast-moving fish require faster shutter speeds. In auto mode, most compact cameras and GoPros can struggle with anything moving quickly. If your camera has a scene mode for sports or action, use it for fish in motion.
Parrotfish working on a coral head, for example, are relatively stationary – they’re focused on eating. Approach slowly from the side, and you can often get within 30 centimetres without disturbing them.
Coral
Coral is one of the easier subjects – it doesn’t move away. The challenge is conveying the scale and structure. Wide shots of coral gardens work best in good light with the sun behind you. For close-up detail shots of coral texture, get as close as the camera allows without touching the reef.
Never touch coral to position yourself for a shot. The damage from a single contact lasts far longer than any photograph is worth.
Giant clams
Giant clams sit open in relatively shallow water and are large, colourful, and stationary – ideal for close-up photography. Position the camera directly above the open mantle and shoot down, or get low and shoot across it at eye level. The patterned mantle in blues and purples photographs well even in modest light.
Related reading: What you’ll actually see underwater on the reef
Practical tips for the day
A few things that make a real difference on the day itself:
- Check your housing seal before you board. A loose o-ring or cracked seal is not something you want to discover at the reef.
- Charge everything the night before. Batteries, action cameras, and phone cases all need a full charge. Bring a spare battery if possible.
- Format your memory card before the tour. Start with empty storage and avoid the panic of running out mid-session.
- Rinse your camera in fresh water after every session. Most vessels have freshwater rinse tanks. Salt buildup in housings and buttons is a slow killer.
- Practice the controls before you get in. Fumbling with unfamiliar buttons while trying not to kick the coral is a recipe for blurry shots and anxiety.
- Don’t shoot constantly. Video mode fills storage fast and gives you hours of footage to review. Be selective – pause, observe, frame, then shoot.
Explore Cairns
Great Barrier Reef
Explore one of the world’s greatest natural wonders with daily reef tours from Cairns. Snorkel, dive or cruise the coral with options to suit every age and ability.
See reef toursShould you buy photos from the onboard photographer?
Most reef day tours from Cairns have a professional photographer onboard – someone who spends every working day in this water, knows where the marine life sits, carries professional underwater housings and strobes, and adjusts technique between sessions.
Their results are almost always better than what a first-time reef photographer with a GoPro will produce. If photos matter to you and this is a trip you’ve planned for a long time, the onboard photography package is worth considering.
That said, there’s something genuinely satisfying about a photo you took yourself – even an imperfect one. The two aren’t mutually exclusive. Shoot your own throughout the day, and if the professional has captured something you missed, the package is there as a backup.
You may also like: What to expect on a Great Barrier Reef day tour

Explore Cairns
Reef Helicopter Tours
See the Great Barrier Reef from breathtaking altitude on a scenic helicopter flight from Cairns. Combine aerial views with snorkelling and reef pontoon visits for the ultimate reef experience.
See helicopter toursFrequently asked questions
Can I use a GoPro to take photos at the Great Barrier Reef?
Yes – a GoPro is one of the most practical options for reef photography on a day tour. It’s small, fully waterproof, easy to manage while snorkelling, and produces good results in clear, bright conditions. The main limitation is the wide-angle lens, which means getting close to your subject is essential. For moving subjects like fish, shoot in burst mode rather than single frames.
What camera settings work best for underwater reef photography?
For compact cameras: use the underwater white balance preset, set ISO to 200-400 in good light, and use a fast shutter speed (1/250 or higher) for moving subjects. For action cameras: shoot in the highest resolution available and use the underwater colour correction mode if available. For all cameras: get closer than feels natural.
How deep can I take my waterproof camera snorkelling?
Check your specific camera’s rating. Most waterproof compact cameras are rated to ten metres – well beyond snorkelling depth. GoPro Hero cameras are rated to ten metres without a housing. Smartphone housings vary by brand – check the manufacturer’s stated depth rating and test the seal before use.
Will the photos look as good as the reef does in real life?
Not without some effort. The underwater environment strips colour and contrast in ways that your eye compensates for naturally, but the camera doesn’t. Good light, getting close to your subject, and using underwater white balance settings close the gap considerably. Some editing afterwards – adjusting colour temperature and adding contrast – helps further. The closer to the surface you shoot in bright morning light, the more the photos match what you actually saw.
Is there an onboard photographer on Cairns reef tours?
Many reef day tours from Cairns include an onboard photographer. Packages vary by operator – some offer unlimited shooting included in the tour price, others sell packages at additional cost. Ask at booking or check-in what photography is included and available.
Ready to book your reef day?
The Great Barrier Reef rewards anyone who shows up with curiosity – and a bit of patience behind the camera. Whether you’re a serious photographer looking for a boutique small-group experience or a family after a straightforward outer reef day, Cairns Discovery Tours can help you find the right tour. Browse our Great Barrier Reef tours from Cairns to find the right fit. If you need help picking a tour that suits photographers, call us on (07) 4028 3567 or get in touch with our team – we know which operators give you the most time in the water.